INTRODUCTION
eAnniversary is an iPhone/iPod app that allows you to save and track birthdays and anniversaries.
This app came with features to remember you and to congratulate those who's birthdays.
Now we will show you how all this work.
LIST SCREEN
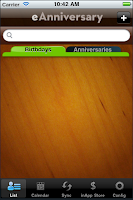
The first screen (list screen) is where you can see all the birthdays and anniversaries that have been added (just touch the respective tab).
It has a bottom bar with several buttons and a top bar with an add button.
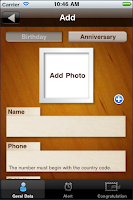
If you touch at this one you'll go to the Add screen and here you can add a new event (birthday or anniversary).
To add an event you must fill the name and date fields.
After you have filled the event data you can set "alerts" to warn you or you can set "congratulate" to congratulate the one who's birthday at a specified date. Before we explain those features lets go back to the list screen.
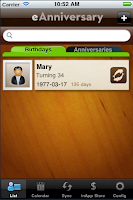
Now you can see that we already have an birthday in our list screen.
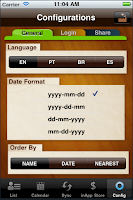
Before we do anything else lets look at the Config screen to see what we can configure.
Looking to the General configurations we see that the language and the date format are
configurable.
You can also set the sort order of the events by the parameter you want.
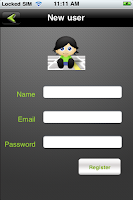
At the Login configuration you can perform a login, if you don't have one you can add a New User.
You have to be logged if you want to use the server side features (Alert and Congratulate) or to buy an inApp product (we will explain this later).
The Share configuration is where you set your Gmail login to be allowed to add your eAnniversary events in your Gmail Calendar (sync feature).
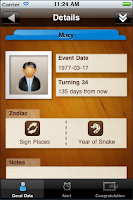
Lets go back to the List screen and select an event.
In the top bar is a double arrow that is pointing to bottom. If you touch it you'll see a bar with a trash and a pencil icons.
The trash button will delete the event and the pencil button will lead you to the Edit Event screen.
In the bottom bar lets touch the Alert button.
ALERT SCREEN
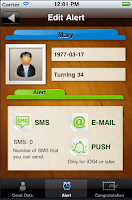
The Alert screen has three features, SMS, E-Mail and Push notifications.
The SMS feature have a number which indicates the number of SMS that you have bought in the eAnniversary inApp Store. If you hadn't bought anyone or you aren't logged, this value will be zero and you wouldn't be able to program SMS sending.
If you have SMS to spend then you can program the eAnniversary to send you a message on the date you have set. You can also choose if you want it to repeat yearly, monthly or never repeat. The SMS will be sent from our server.
The E-Mail feature is free but you need to be logged to use it. This feature will sent you an email on the date you have set. The e-mail will be sent from our server.
The Push notification is also free and you don't need to be logged. This feature will send to your iPhone/iPod a notification with the message you have wrote at the date you have set. The PUSH Notification only works if you have iOS4.
CONGRATULATE SCREEN
Look again to the bottom bar and touch the Congratulate button.
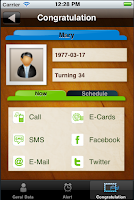
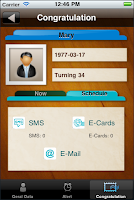
Here you have two tabs, the "Now" and the "Schedule". The difference between this two menus is that in the first one you congratulate the person now, i.e, you don't program any date to congratulate in the future. The second one (Schedule) it's for those congratulations that you want to program to be in a particular day and you can set it to repeat in the future.
Let's first talk about the "Now" Menu.
The Call feature will open the iPhone phone app with the phone number of the person. You can use the Call feature without being logged.
The SMS feature will open the iPhone Message app, i.e., it wouldn't use the SMS from the inApp. If you sent an SMS from here it will cost according to your iPhone plan, it has nothing to do with your login data and the packs you had bought in inApp. You can use this feature without being logged.
The E-Mail feature will open the email screen and it will be sent now. To use this feature you don't have to be logged.
The E-Cards feature is the only one that only works if you are logged and if you have bought an E-Card pack in the inApp store. Here you can choose the postcard you want to send and the message. You can see the preview to look how it would be. The E-Card will be sent now, if you have E-Cards to spent. The E-Card is sent from our server.
The Twitter and Facebook features allows you to post in your wall messages to your friends.
Touch in the "Schedule" tab and you can see three features, SMS, E-Cards and E-Mail.
Like was told, the main propose of this features is to program a congratulation to be sent at specified date and be (or not be) repeated. To use one of this three features you need to be logged.
The SMS feature at this menu works like in the Alert menu, it's required to have bought a SMS pack in the eAnniversary inApp Store. Then, if you have SMS to spent you can set the phone number, message and date when to send the message. It can also be repeated yearly, monthly or never. It will repeat only if at the sent date you have SMS to spent. The SMS will be sent from our server.
The E-Cards feature works basically like the SMS feature. It's required to have bought an E-Card pack in the eAnniversary inApp Store. Then, if you have E-Cards to spent you can set the postacard, email, message and date when to send the e-card. It can also be repeated yearly, monthly or never. It will repeat only if at the sent date you have E-Cards to spent. The E-Cards will be sent from our server.
The E-Mail is free, you only have to be logged. At this feature you can set the email, message and date when to send it. It can be repeated yearly, monthly or never and also for free. The e-mail will be sent from our server.
Lets go back to the List screen and then touch in the Calendar tab at the bottom bar.
CALENDAR SCREEN
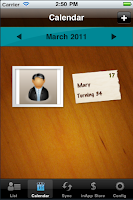
In the Calendar screen you can see the events organized by month.
You can navigate in the calendar touching those arrows in the blue top bar.
The Add button in the brown top bar allows you to add an event with the date pre-field as the first day of the month and year you are in the calendar.
Selecting an event will lead you to the main screen of that event. It's like if you had touch in the event on the List screen.
Touch in the Sync button at the bottom bar to go to the Sync screen.
SYNC SCREEN
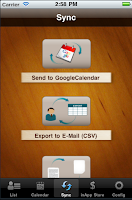
At this screen you have four different features.
The first one, "Send to GoogleCalendar", as it is named, it will insert in your GoogleCalendar the events you have inserted in eAnniversary. To use this feature you must have logged in the Config->Share->GoogleCalendar.
The "Export to E-Mail" will export a file in csv format with all your events to your email.
The "Backup in Server" will send to our servers all your eAnniversary data to allows you to recover later. To use this service you need to be logged and you have to buy the Backup subscription at the eAnniversary inApp Store. Every time you buy a new subscription, that time is added to the time you already have bought. While you have "Backup time" you can backup and recover your data whenever you want to.
The "Sync AddressBook" allows you to sync all your contacts from your Contacts Book to eAnniversary. A contact will be added only if it has birthdate.
INAPP STORE SCREEN
What remains now is to explain the inApp Store.
Touch in the inApp Store button at the bottom bar. If you don't have the In-App Purchases enable you would not be able to open it.
To enable the In-App Purchases go to Settings->General->Restrictions.
At this screen you have all the packs you can buy and you have also the purchase and consume history of your products.
To use this features you need to be logged.
We hope that this tutorial has been useful.
If you want to contact us please send an email to us.
Best regards,
Idea-Factory
We provide some videos too.
- Video tutorial about List, Config, Alert and Congratulate features
- Video tutorial about Calendar feature
- Video tutorial about Sync feature
